
Post by Andi on Jul 7, 2011 17:34:17 GMT
The camchain tensioner is a well known weak point on these engines, and a thorough overhaul will certainly save you from engine damage and big bills.
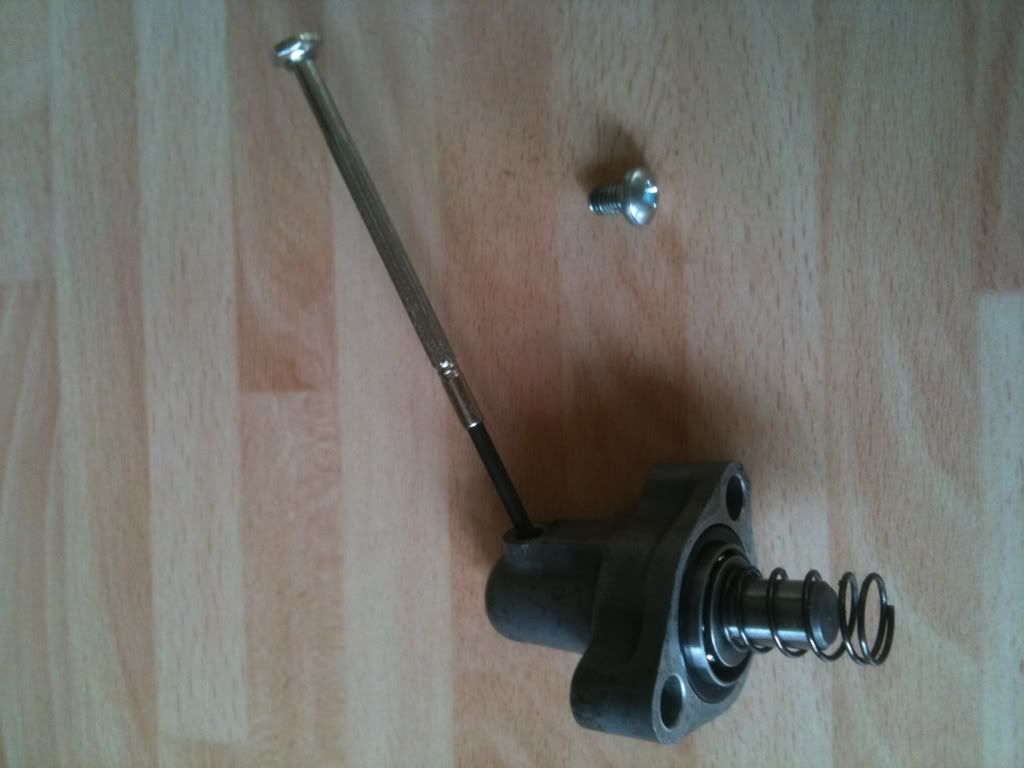
First and most important is to undo and remove the tiny crosshead screw in the top of the unit, failure to remove this will cause excessive grief later on.
Next undo the 2 x8mm headed bolts, 3 turns at a time to release the pressure gradually, and then remove the unit along with the thin spring.
Lay out all the parts on a clean cloth, and clean all parts thoroughly.
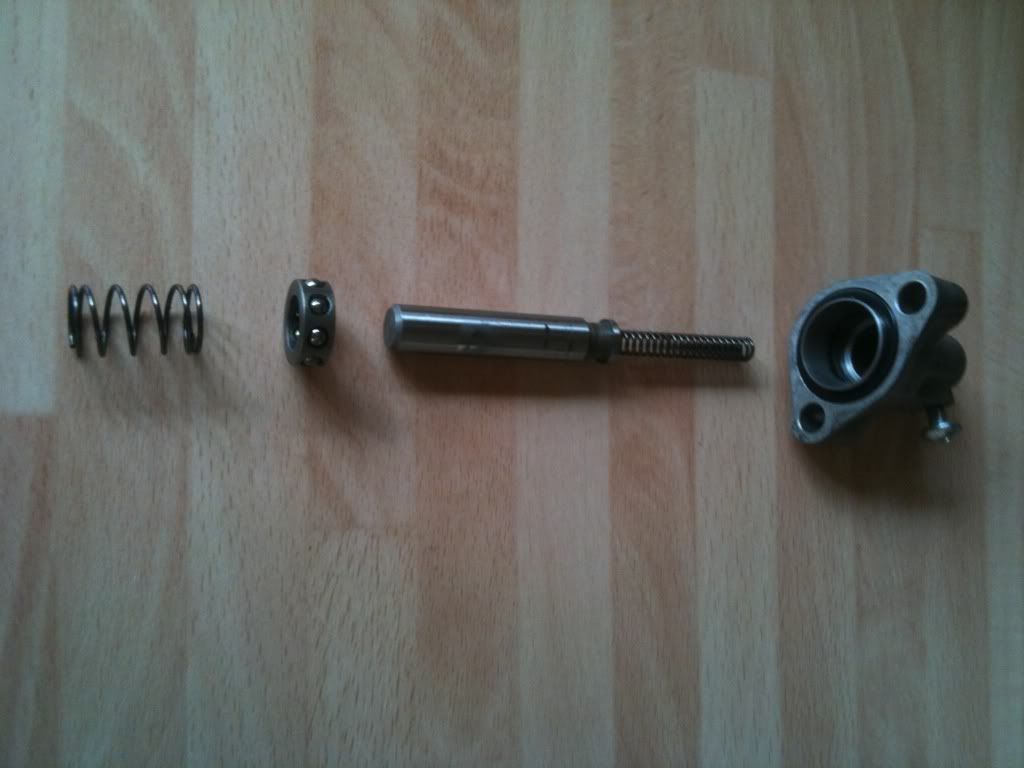
Measure the spring lengths using vernier calipers and match the spec against the tolerances in the workshop manual.
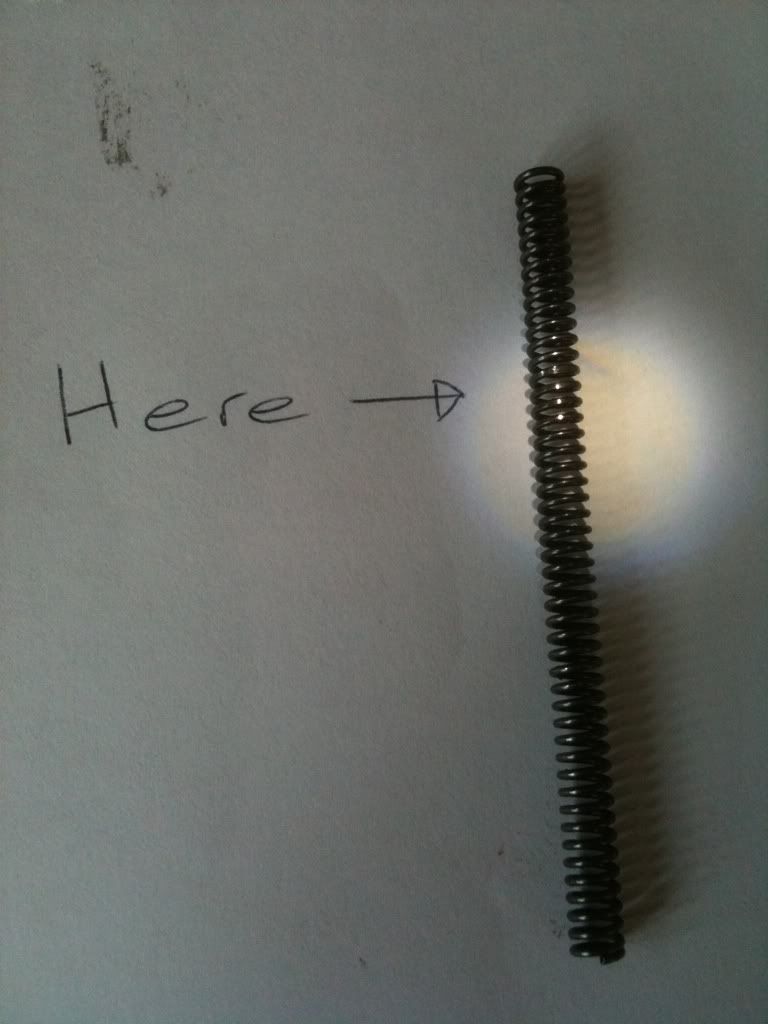
Look for wear marks on the spring in the area where the arrow is pointing, any wear will show as a shiny area that appears as though the coil is flattening.
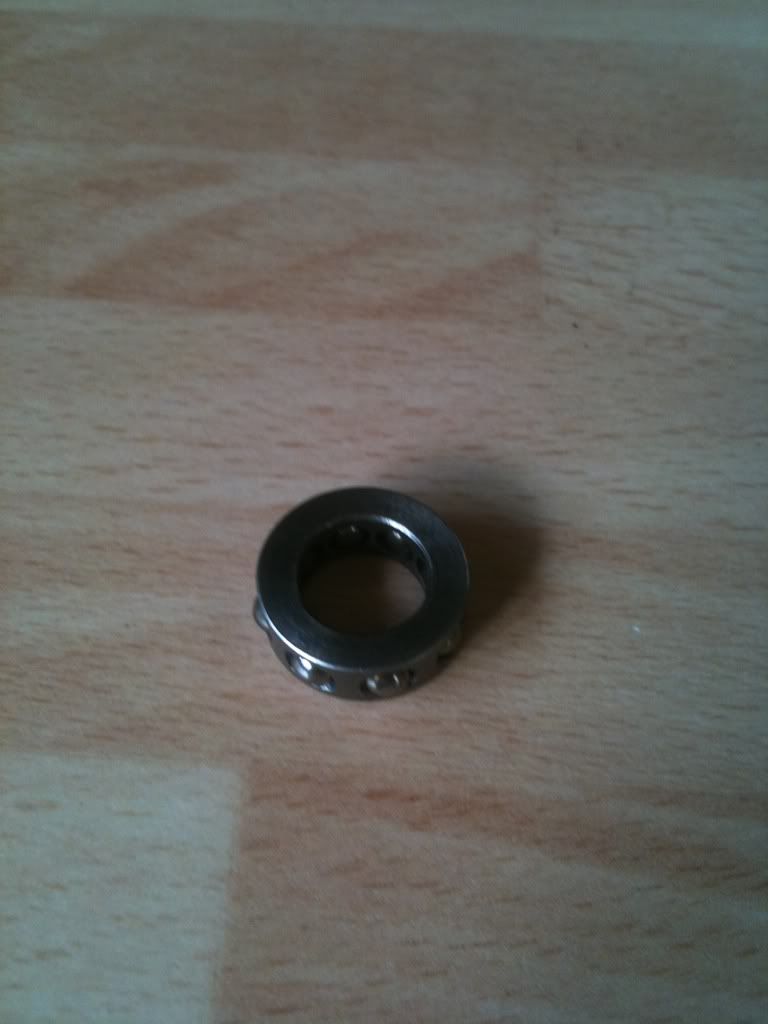
Next check is the roller bearing and its cage, ensure all bearing are round and can rotate freely in their cage.
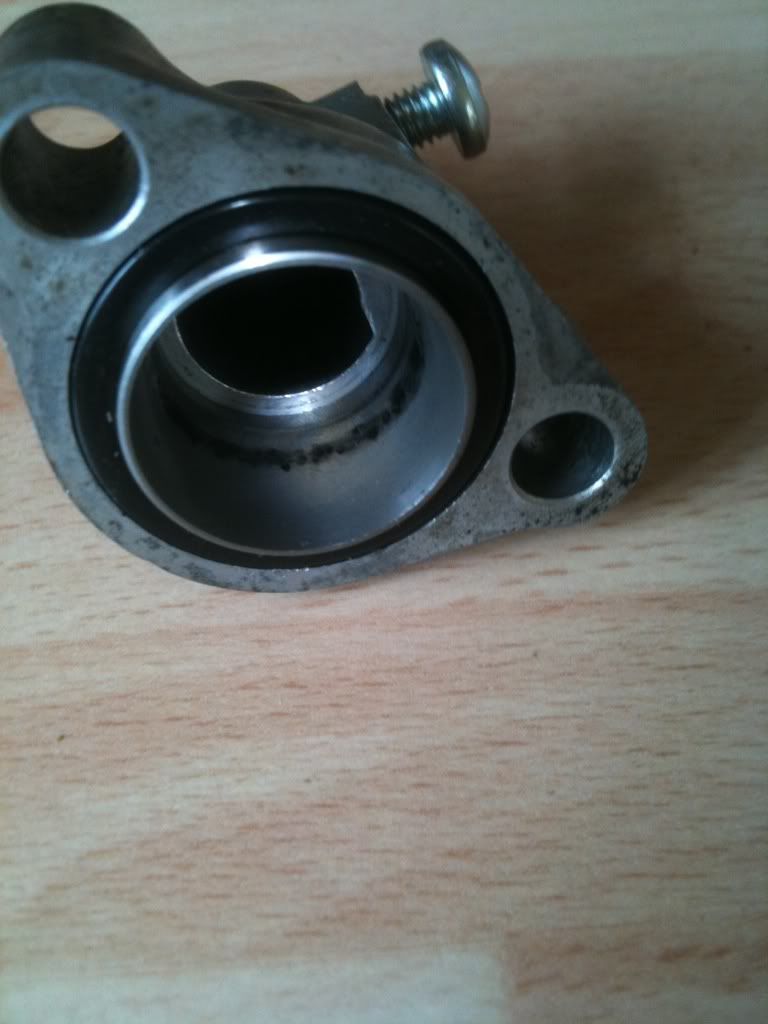
Check the sleeve walls inside for wear or grooving where the bearing sits against the wall. The sleeve is available seperately if it has excessive damage.
Final part is to reassemble it all, then use a small flat blade screwdriver, and pushing the shaft with the spring and bearing all the way up inside, use the screwdriver tip through the crosshead screw hole, and secure it all together.
Carefully refit it back on the bike, and again secure the 2x8mm bolts evenly until torqued correctly, then remove the screwdriver, and refit the crosshead screw, but do not overtighten it.
First and most important is to undo and remove the tiny crosshead screw in the top of the unit, failure to remove this will cause excessive grief later on.
Next undo the 2 x8mm headed bolts, 3 turns at a time to release the pressure gradually, and then remove the unit along with the thin spring.
Lay out all the parts on a clean cloth, and clean all parts thoroughly.
Measure the spring lengths using vernier calipers and match the spec against the tolerances in the workshop manual.
Look for wear marks on the spring in the area where the arrow is pointing, any wear will show as a shiny area that appears as though the coil is flattening.
Next check is the roller bearing and its cage, ensure all bearing are round and can rotate freely in their cage.
Check the sleeve walls inside for wear or grooving where the bearing sits against the wall. The sleeve is available seperately if it has excessive damage.
Final part is to reassemble it all, then use a small flat blade screwdriver, and pushing the shaft with the spring and bearing all the way up inside, use the screwdriver tip through the crosshead screw hole, and secure it all together.
Carefully refit it back on the bike, and again secure the 2x8mm bolts evenly until torqued correctly, then remove the screwdriver, and refit the crosshead screw, but do not overtighten it.